
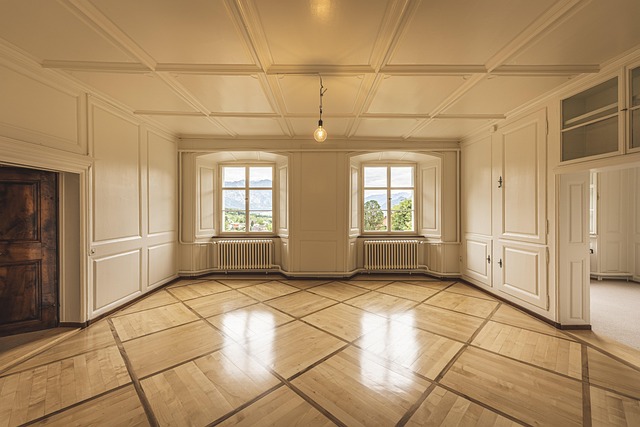
What is a Tongue and Groove Ceiling?
A tongue and groove ceiling is a style of wood paneling where the edges of each board are shaped to interlock, creating a smooth, continuous surface. One edge features a protruding ‘tongue,’ while the opposite edge has a corresponding ‘groove,’ allowing them to fit snugly together. This method not only provides a clean aesthetic but also contributes to structural integrity.
Last updated: May 30, 2026
As of May 2026, tongue and groove ceilings are experiencing a resurgence in popularity, appreciated for their timeless appeal and ability to add warmth and texture to interior spaces. They can be installed in various wood types and finishes, making them adaptable to both rustic and modern design schemes.
Understanding the Interlocking Mechanism
The defining characteristic of tongue and groove ceilings is their interlocking joint. Each wood plank is milled with a precisely shaped tongue along one edge and a corresponding groove along the opposite edge. When installed, the tongue of one board slides into the groove of the next. This creates a tight, flush fit that hides the seam between boards.
This method of joining wood is not new; it has been used for centuries in various applications, from flooring and cabinetry to wall paneling. Its enduring popularity stems from its ability to create a strong, stable, and aesthetically pleasing surface. For ceilings, it offers a continuous, clean look that can transform a room’s ambiance.

Why Choose a Tongue and Groove Ceiling in 2026?
Most homeowners considering a wood ceiling are looking for warmth, character, and a departure from standard drywall. Tongue and groove ceilings excel in delivering these qualities, offering significant aesthetic and practical advantages. As of May 2026, they are particularly sought after for creating cozy, inviting spaces.
Beyond aesthetics, the interlocking nature of the boards provides a more strong installation than simply nailing individual planks. This can lead to a more durable ceiling that’s less prone to warping or separating over time, especially in environments with fluctuating humidity. According to HomeAdvisor, wood ceilings can increase home value and appeal.
Enhanced Aesthetic Appeal
The primary draw of a tongue and groove ceiling is its visual impact. The linear patterns created by the planks, combined with the natural beauty of wood, add depth and dimension. Whether you opt for a natural wood finish, a painted look, or a stained hue, the texture and warmth are undeniable.
This style is incredibly versatile, fitting seamlessly into a wide array of interior design themes. From the cozy charm of a cabin retreat to the clean lines of a modern farmhouse, a wood plank ceiling can be a focal point or a subtle enhancement, depending on the wood type and finish chosen.
Durability and Longevity
When installed correctly, tongue and groove ceilings are remarkably durable. The interlocking system creates a cohesive unit that distributes stress evenly, reducing the likelihood of individual planks sagging or shifting. This makes them a long-lasting option for homeowners seeking a permanent upgrade.
Unlike some other ceiling materials, wood can withstand minor impacts without cracking or denting easily. The inherent strength of the interlocking mechanism means fewer gaps can develop over time, maintaining a cleaner appearance and potentially reducing drafts.
Improved Acoustics
Wood surfaces, particularly when combined with the air gap created by joists or furring strips during installation, can help to absorb and diffuse sound waves. This can lead to a noticeable reduction in echo and ambient noise within a room, creating a more comfortable auditory environment. This benefit is often overlooked but is a significant advantage in open-plan living areas or rooms with hard flooring.
Tongue and Groove Ceiling Materials: Options and Considerations
The material choice for your tongue and groove ceiling significantly impacts its look, durability, and cost. While solid wood is traditional, engineered options and composite materials offer alternatives that can meet specific budget or performance needs.
Solid Wood
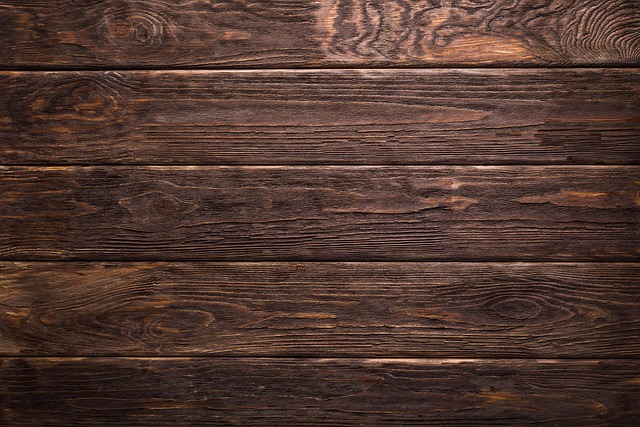
Solid wood planks are the classic choice. Common options include pine, cedar, oak, maple, and redwood. Each offers unique grain patterns, color variations, and hardness. Pine is generally the most affordable, while hardwoods like oak and maple are more durable and expensive.
Consider the intended aesthetic and the room’s environment. Cedar, for instance, is naturally resistant to insects and decay, making it suitable for certain applications, though it can be pricier. The natural beauty and warmth of solid wood are unparalleled, offering a rich, authentic feel.
Engineered Wood
Engineered wood planks, such as those with a plywood core and a real wood veneer, offer a stable and often more budget-friendly alternative to solid wood. They are less prone to expanding and contracting with humidity changes, which can be a significant advantage in kitchens or bathrooms.
These products are designed to mimic the look of solid wood but can sometimes lack the same depth of grain or character. They are an excellent choice for achieving a wood ceiling look without the premium cost or potential issues associated with solid wood in challenging environments.
MDF and Composite Materials
Medium-Density Fiberboard (MDF) or other composite materials can also be manufactured with tongue and groove profiles. These are typically painted or finished to resemble wood. They are a very cost-effective option and can be easier to work with than solid wood.
However, MDF and composites are susceptible to moisture damage if not properly sealed and maintained. They also may not offer the same natural aesthetic or acoustic benefits as real wood. For a budget-conscious project where a painted wood look is desired, these can be a viable option.
Veneered Panels and Laminates
Some products mimic wood grain using high-resolution printed veneers or laminates over a stable core. These are often the most affordable options and can be quite convincing from a distance. They are generally lightweight and easy to install.
While they offer a budget-friendly way to achieve a wood-look ceiling, they lack the tactile quality and depth of real wood. Durability can also be a concern, as the printed surface can scratch or peel over time, especially in high-traffic areas. For a quick refresh or a temporary solution, they might suffice.
Tongue and Groove Ceiling Design Styles
The versatility of tongue and groove ceilings allows them to complement a wide range of interior design styles. The choice of wood, finish, and plank width plays a crucial role in achieving the desired look.
Rustic and Farmhouse
For a rustic or farmhouse aesthetic, wide planks in distressed or knotty wood like pine or reclaimed wood are popular. A natural or lightly stained finish enhances the wood’s inherent character, showcasing imperfections and grain patterns. This style brings warmth and a sense of history to a space.
Consider using wider planks, around 5-7 inches, to enhance the rustic feel. Leaving some natural knots and variations in the wood can add to the charm. This look is perfect for country kitchens, cozy living rooms, or cabins.
Modern and Contemporary
Achieving a modern look with tongue and groove ceilings often involves using smoother, lighter-colored woods like maple or birch, or painting the planks a crisp white or a bold, dark color. Sleek, narrow planks can also contribute to a cleaner, more minimalist appearance.
A matte or satin finish tends to work best for modern designs, avoiding excessive sheen. Consider a horizontal installation pattern to draw the eye and create a sense of spaciousness. This approach can add subtle texture and warmth without overwhelming a minimalist decor.
Coastal and Beachy
Light-colored woods, whitewashed finishes, or painted planks in soft blues and grays are ideal for coastal or beach-themed interiors. The goal is to evoke a sense of openness and light, reminiscent of sea breezes and sandy shores. Narrower planks can enhance this airy feel.
Consider shiplap-style paneling, which shares the interlocking principle and is often used in coastal designs. The key is a light, airy palette that complements natural light and a relaxed atmosphere. This style works well in beach homes, sunrooms, or any space aiming for a serene escape.
Traditional and Elegant
For a more traditional or elegant setting, richer wood tones like oak or cherry, or finely finished maple, can be employed. A clear coat or a subtle stain can highlight the wood’s natural beauty, creating a sophisticated look. Narrower to medium-width planks often lend themselves to more formal interiors.
This style pairs well with classic architectural details and furnishings. The aim is to create a refined, polished look that adds depth and luxury without appearing overly rustic. A consistent, smooth finish is key here.

Tongue and Groove Ceiling Installation: A Step-by-Step Overview
Installing a tongue and groove ceiling can be a rewarding DIY project for those with some carpentry experience, but it requires precision and patience. For professionals, the process is straightforward, typically taking 1-3 days depending on the room size and complexity.
Preparation
Begin by ensuring the existing ceiling structure is sound and level. If installing over an existing ceiling, remove any old fixtures, insulation, or debris. For new construction, install furring strips at 16-inch or 24-inch intervals, perpendicular to the joists, to provide a solid fastening surface. Plan your layout, deciding on plank direction (typically parallel to the longest wall) and starting point.
Cutting and Fitting
Start in a corner, typically the one furthest from the main entry. Cut the first board to fit, ensuring the tongue or groove faces the direction of installation as needed (some systems allow either). Use a miter saw for precise cuts. For planks that need to be cut to length, measure carefully and use a table saw or circular saw.
Fastening
There are several methods for fastening tongue and groove planks: face-nailing, blind-nailing, or stapling. Face-nailing involves driving fasteners directly through the face of the board into the joists or furring strips. Blind-nailing, often done with a pneumatic nail gun or staple gun angled through the tongue, is preferred for a cleaner look as fasteners are hidden.
Ensure fasteners are long enough to penetrate the plank and securely anchor into the underlying framing or furring strips. For example, 1-1/4 inch or 1-1/2 inch staples or brad nails are commonly used for standard 1/2-inch thick planks.
Working Around Obstacles
Special cuts will be needed for light fixtures, vents, or other ceiling penetrations. Measure these areas precisely and use a jigsaw to cut out the openings in the planks before installation. For electrical boxes, ensure they are accessible for future maintenance. Remember to account for expansion gaps, especially if using solid wood in humid areas.
Finishing Touches
Once all planks are installed, trim any excess material and install trim molding around the perimeter of the room to conceal expansion gaps and provide a clean transition to the walls. Apply your chosen finish (stain, paint, or clear coat) according to the manufacturer’s instructions. Proper sealing is crucial for protecting the wood.
The Cost of Tongue and Groove Ceilings in 2026
The cost of a tongue and groove ceiling can vary significantly based on material, complexity, and whether you hire professionals or opt for a DIY approach. As of May 2026, expect prices to range from approximately $5 to $25 per square foot, covering both materials and installation.
Material Costs
Solid wood planks are generally the most expensive, with prices varying by wood species. Pine might cost $3-$8 per square foot, while hardwoods like oak or maple can range from $10-$20+ per square foot. Engineered wood or composite options can often be found for $2-$7 per square foot.
Finishes, stains, and sealants will add to the material cost. For example, a high-quality polyurethane sealant might cost $30-$50 per quart. Lighting fixtures and trim molding are additional expenses. According to Home Depot pricing in 2026, basic pine tongue and groove can be found for around $4-$6 per linear foot for a 6-inch wide board.
Labor Costs
Professional installation typically adds $4-$10 per square foot to the total cost. This includes labor for preparation, fastening, trimming, and finishing. The complexity of the room (e.g., high ceilings, numerous angles, existing obstructions) can increase labor charges.
For a 200-square-foot room, professional installation might range from $1,500 to $4,000 or more, depending on the materials chosen. DIY installation can save significantly on labor, but requires tools and time. A typical DIYer might spend $500-$2,000 on materials for the same 200 sq ft room, plus tool rental or purchase costs.
Factors Influencing Price
Key factors affecting the overall price include:
- Wood Species: Pine is budget-friendly; oak, maple, and exotic woods are premium.
- Plank Width and Length: Wider or longer planks may cost more per square foot.
- Finish: Pre-finished planks are convenient but can be pricier than finishing yourself.
- Installation Complexity: Non-standard room shapes or intricate details increase labor.
- Location: Regional labor rates and material availability can impact pricing.
For instance, a 150 sq ft bedroom with knotty pine tongue and groove, installed by a professional in a moderate cost-of-living area, might cost between $900 ($6/sq ft) to $2,100 ($14/sq ft).
Maintaining Your Tongue and Groove Ceiling
Maintaining a tongue and groove ceiling is generally straightforward, especially for sealed or painted surfaces. The key is regular light cleaning and prompt attention to any issues.
Cleaning
For dust and light debris, a soft-bristled brush, a feather duster, or a vacuum cleaner with a brush attachment is usually sufficient. For more stubborn grime or stains, use a slightly damp cloth with a mild, wood-safe cleaner. Avoid abrasive cleaners or excessive moisture, which can damage the finish or the wood itself.
Touch-Ups and Repairs
Over time, minor scratches or scuffs may appear. These can often be addressed with touch-up paint or stain. If individual planks become significantly damaged, they can sometimes be replaced individually, though this can be a more involved repair. Ensure you have extra material from the original installation for such purposes.
For painted ceilings, touch-ups are generally easier. For stained finishes, matching the original color precisely can be challenging, so having leftover stain or knowing the exact product used is beneficial. According to Wood Magazine, proper ventilation and avoiding direct, intense sunlight can prolong the life of any wood finish.
Protection
Protect your ceiling from excessive moisture and direct sunlight. In bathrooms or kitchens, ensure good ventilation to prevent mold and mildew. Use blinds or curtains to shield the wood from harsh UV rays, which can cause fading and discoloration over time.
Tongue and Groove vs. Shiplap vs. Beadboard Ceilings
While all three offer a planked look, there are distinct differences between tongue and groove, shiplap, and beadboard ceilings, particularly in their joinery and typical aesthetic.
| Feature | Tongue and Groove | Shiplap | Beadboard |
|---|---|---|---|
| Joinery | Tongue slides into groove, creating a flush, tight seam. | Edges overlap, creating a small visible gap or shadow line. | Grooves are typically narrower and more defined, often with a bead-like profile in the groove. |
| Aesthetic | smooth, clean, versatile. Can be modern or rustic. | Slightly more rustic/farmhouse feel due to the visible overlap. | Classic, traditional, often associated with coastal or cottage styles. |
| Installation Ease | Can be blind-fastened, often requires more precision. | Generally easier to install due to overlapping nature; less critical alignment. | Similar to tongue and groove; precision needed for the bead profile. |
| Typical Use | Walls, ceilings, furniture. Highly versatile. | Walls, accent walls, ceilings. Popular for farmhouse style. | Ceilings, wainscoting, accent walls. |
| Cost (Material) | Moderate to high, depending on wood type. | Moderate, often comparable to T&G. | Moderate, can be slightly less expensive than T&G for some wood types. |
Tongue and groove offers the most smooth finish, making it the most adaptable. Shiplap has a more pronounced, rustic charm due to its overlapping edges, while beadboard is characterized by its distinct, linear ‘bead’ within the groove, offering a more specific, traditional look.
Common Mistakes to Avoid with Tongue and Groove Ceilings
While tongue and groove ceilings offer many benefits, homeowners and DIYers can make mistakes that compromise the final look or longevity. Being aware of these pitfalls can save time and money.
Inadequate Preparation
Failing to prepare the sub-ceiling properly is a common error. This includes not ensuring the underlying structure is level, not removing old fixtures, or not installing adequate furring strips. This can lead to a wavy ceiling, loose planks, and difficulty in achieving a clean finish.
Solution: Thoroughly inspect and prepare the existing ceiling. Install furring strips at consistent intervals (16″ or 24″ on center) and ensure they are plumb and level. Use a laser level for accuracy.
Not Accounting for Expansion
Wood expands and contracts with changes in temperature and humidity. Installing planks too tightly against walls or fixed objects without an expansion gap can cause buckling or warping over time, especially with solid wood.
Solution: Leave a 1/8″ to 1/4″ expansion gap around the perimeter of the room, between the planks and the walls. This gap will be concealed by trim molding.
Using the Wrong Fasteners
Using fasteners that are too short or too thin can lead to loose planks. Conversely, fasteners that are too long can penetrate through to the visible surface or into existing ceiling structures where they shouldn’t. Inconsistent fastening can also cause issues.
Solution: Use fasteners recommended for the plank thickness and material. For 1/2-inch thick planks, 1-1/4″ to 1-1/2″ staples or brad nails are common. Ensure fasteners are driven at an appropriate angle (e.g., through the tongue for blind-nailing) and are long enough to anchor securely into the joists or furring strips.
Mismatched Materials or Finishes
Mixing different batches or brands of wood, or using incompatible finishes, can result in an inconsistent appearance. Wood from different batches may have slight color variations, and incorrect finishes can lead to peeling or discoloration.
Solution: Purchase all planks from the same lot if possible. If not, mix planks from different boxes to distribute variations evenly. Always use finishes recommended by the plank manufacturer and test them in an inconspicuous area first.
Over-Moisturizing During Cleaning
Using too much water or harsh cleaning solutions can damage the wood’s finish and the wood itself, leading to swelling, staining, or mold growth. This is particularly problematic in areas with poor ventilation.
Solution: Always use a slightly damp cloth, not a wet one, for cleaning. Use only mild, wood-specific cleaners. Ensure the room has adequate ventilation, especially in kitchens and bathrooms.
Expert Tips for Tongue and Groove Ceilings
Beyond the basic installation, a few expert insights can elevate your tongue and groove ceiling project, ensuring a beautiful and lasting result. As of May 2026, these tips focus on maximizing value and aesthetic impact.
Consider the Plank Orientation
The direction you lay your planks can dramatically affect the perception of space. Running planks parallel to the longest wall typically makes a room feel larger. However, running them perpendicular to the main light source can sometimes create more depth and visual interest.
For very long, narrow rooms, installing planks across the width can make the room appear wider. Experiment with visual mock-ups or use online design tools to see how different orientations might impact your specific space.
Embrace Imperfections for Character
When opting for rustic woods like pine, knots and grain variations are part of the charm. Don’t try to eliminate them; embrace them. This adds authenticity and character that manufactured materials often lack. A quality sealant will protect these natural features.
According to the Forest Products Laboratory (as cited in various woodworking journals), the natural characteristics of wood contribute significantly to its aesthetic value. A well-finished, natural wood ceiling can be a stunning focal point.
Pre-finishing for Efficiency
If you’re painting or staining, consider pre-finishing the planks before installation. Laying them out and applying your finish in a controlled environment like a garage or workshop can be more efficient and lead to a more uniform coat than working overhead on a ladder.
This is especially true for darker stains or multiple coats, where drying time is crucial. However, ensure the finish is fully cured before installation to avoid damage during handling and fastening. Some manufacturers offer pre-finished options that simplify this step further.
Use a Quality Underlayment for Soundproofing
If acoustics are a priority, consider installing a sound-dampening underlayment material between the joists or furring strips and the tongue and groove planks. This can significantly enhance the sound-absorbing properties of the ceiling.
Materials like mass-loaded vinyl (MLV) or specialized acoustic insulation can be effective. While this adds to the cost and complexity, it can transform a room into a more serene and comfortable space, especially in multi-story homes or apartments.
Don’t Forget the Lighting
The type of lighting you choose can complement or detract from your wood ceiling. Recessed lighting works well, but consider the spacing and beam angle to avoid creating harsh shadows or glare on the wood. Track lighting can offer flexibility. Ambient lighting is key to showcasing the wood’s texture and warmth.
Frequently Asked Questions
Can I install a tongue and groove ceiling over an existing popcorn ceiling?
Yes, in many cases. However, the popcorn texture must be scraped down, and the underlying drywall must be sound and level. Furring strips are often recommended to create a stable fastening surface for the new planks.
What is the best wood for a tongue and groove ceiling?
The ‘best’ wood depends on your budget and desired aesthetic. Pine is affordable and easy to work with for a rustic look. Hardwoods like oak or maple offer greater durability and a more refined appearance but come at a higher cost.
How long does tongue and groove ceiling installation take?
For a standard-sized room (e.g., 150-200 sq ft), professional installation typically takes 1 to 3 days. DIY installation can take longer, potentially a full weekend or more, depending on experience and available tools.
Can tongue and groove ceilings be painted?
Absolutely. Painted tongue and groove ceilings are very popular, especially for achieving modern, farmhouse, or coastal looks. Ensure you use a primer suitable for wood and a durable topcoat for best results.
Are tongue and groove ceilings good for kitchens and bathrooms?
They can be, provided you choose moisture-resistant wood or a well-sealed engineered product. Proper ventilation is critical in these areas to prevent moisture damage and mold growth. Avoid solid wood in very high-humidity environments without excellent ventilation.
What is the difference between tongue and groove and shiplap ceilings?
Tongue and groove planks interlock flush, creating a smooth surface. Shiplap planks overlap, leaving a visible shadow line between them, which often lends a more rustic or farmhouse aesthetic.
Last reviewed: May 2026. Information current as of publication; pricing and product details may change.
Editorial Note: This article was researched and written by the Day Spring Management editorial team. We fact-check our content and update it regularly. For questions or corrections, contact us.

