Unlock Your Home’s Potential with DIY Improvement in 2026
Most homeowners dream of a more beautiful and functional living space, but the cost of professional renovations can be daunting. Fortunately, by understanding how to DIY home improvement, you can achieve significant upgrades without breaking the bank. As of May 2026, the demand for cost-effective, personalized home enhancements continues to grow, making DIY skills more valuable than ever.
Last updated: May 22, 2026
Key Takeaways
- Prioritize planning and skill assessment before starting any DIY project.
- Budgeting accurately and sourcing materials wisely are crucial for cost-effectiveness.
- Safety should always be the top priority throughout any home improvement task.
- Start with smaller, manageable projects to build confidence and experience.
- Well-executed DIY projects can significantly increase your home’s value and your personal satisfaction.
Laying the Groundwork: Essential DIY Project Planning
Embarking on a DIY home improvement project without a clear plan is a common pitfall. Before you even pick up a tool, take time to assess your skills, the project’s scope, and your available resources. A well-defined plan acts as your roadmap, ensuring you stay on track and avoid costly mistakes.
Consider the complexity of the task. Are you comfortable with basic carpentry, electrical work, or plumbing? If not, it might be wiser to tackle simpler projects first, like painting a room or installing new hardware, rather than attempting a full bathroom remodel. According to a 2025 survey by HomeAdvisor, nearly 40% of DIY projects encountered unexpected challenges, often due to insufficient planning.
For instance, Sarah wanted to update her kitchen. She started by watching numerous online tutorials on cabinet refacing. However, she underestimated the time and precision required for sanding and sealing, leading to a project that stretched over three weekends instead of one. Proper research into the specific techniques and material requirements beforehand could have saved her considerable stress and time.
Mastering the Budget: Smart Spending for Home Upgrades
One of the primary motivations for DIY home improvement is cost savings. However, without careful budgeting, expenses can quickly spiral. Establishing a realistic budget early on is key to keeping your project financially sound. Factor in not just the cost of materials, but also tools, permits (if required), and a contingency fund for unforeseen issues.
For example, a simple deck staining project might seem straightforward, but the cost of high-quality stain, brushes, rollers, and cleaning supplies can add up. A 5-gallon bucket of premium exterior stain, suitable for a moderate-sized deck, can range from $150 to $300. Always compare prices from different suppliers and consider buying in bulk for larger projects.
When budgeting for a DIY kitchen backsplash, remember to account for adhesive, grout, spacers, and potentially a new caulk gun if you don’t own one. A common mistake is forgetting these smaller but essential items, which can add 15-20% to your projected material cost. As of May 2026, many hardware stores offer project-specific material calculators on their websites, which can help you estimate quantities more accurately.
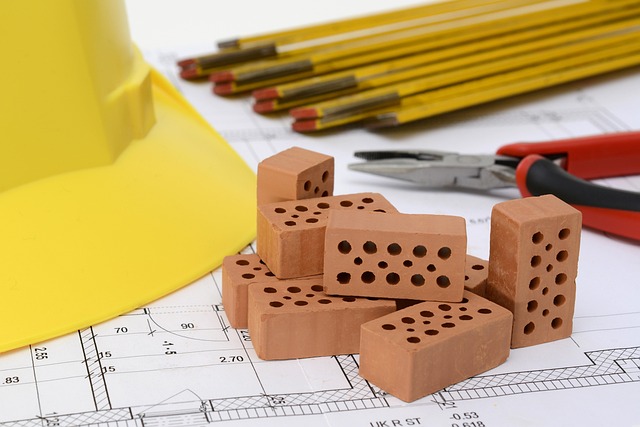
Equipping Yourself: Tools and Safety First
Having the right tools can make a significant difference in the efficiency and quality of your DIY home improvement work. While you don’t need to buy every specialized tool, investing in a few key items will serve you well for many projects. A reliable cordless drill, a set of screwdrivers, a tape measure, a level, and a good utility knife are foundational.
Beyond tools, safety can’t be overstated. Always wear appropriate personal protective equipment (PPE). This includes safety glasses to protect your eyes from debris, work gloves to prevent cuts and splinters, and sturdy footwear. For tasks involving dust, such as sanding or demolition, a dust mask or respirator is essential. According to the Occupational Safety and Health Administration (OSHA), eye injuries are one of the most common workplace accidents, and many are preventable with proper eye protection.
For any electrical work, even simple tasks like changing a light fixture, ensure the power is shut off at the breaker box first. If you’re unsure, it’s always best to consult a professional electrician. Similarly, for plumbing tasks, know where your home’s main water shut-off valve is located. Mistakes in these areas can lead to significant damage and hazards.
Simple Starts: DIY Projects for Novice DIYers
For those new to DIY home improvement, starting with smaller, less intimidating projects is the best approach. These allow you to gain confidence, learn basic techniques, and understand the process without the pressure of a high-stakes renovation. Success in these initial endeavors can pave the way for more ambitious undertakings.
Consider tasks like painting an accent wall, updating cabinet hardware, installing a new faucet, or replacing a light fixture. A fresh coat of paint can dramatically change the ambiance of a room for under $100. Changing out old, tarnished cabinet knobs for modern ones can refresh your kitchen or bathroom’s look in less than an hour. These projects typically require minimal specialized tools and offer immediate, satisfying results.
Another excellent beginner project is assembling flat-pack furniture. While seemingly simple, it hones skills in following instructions, using basic tools, and ensuring structural integrity. For instance, assembling a small bookshelf might take an hour or two and requires only a screwdriver and the provided Allen wrench. This type of task builds familiarity with fasteners and assembly techniques, which are fundamental to many larger DIY endeavors.
Stepping Up: Intermediate DIY Home Improvement
Once you’ve mastered the basics, you can explore intermediate DIY home improvement projects that offer more significant aesthetic or functional upgrades. These might involve slightly more complex tools or techniques but still remain manageable for the dedicated DIYer. Projects like installing a new backsplash, building a simple raised garden bed, or refinishing hardwood floors fall into this category.
For a kitchen backsplash, ceramic tiles offer a wide range of styles and are relatively forgiving for beginners. A 10-square-foot area might cost between $50 and $200 for tiles, depending on the material. The process involves measuring, cutting tiles, applying adhesive, setting tiles, and grouting. While it requires patience, the visual impact is substantial.
Refinishing hardwood floors can be a more labor-intensive project, but the results can be stunning. This typically involves renting a floor sander, choosing a stain and finish, and applying them carefully. A DIY floor refinishing project for a 200-square-foot room could cost around $200-$400 for materials, compared to thousands for professional services. It’s a project that demands careful preparation and attention to detail.

Ambitious Endeavors: Advanced DIY Home Improvements
For the truly experienced DIYer, advanced projects can transform a home and potentially add substantial value. These typically involve more complex skills, specialized tools, and a greater understanding of building codes and regulations. Examples include building a deck, finishing a basement, or undertaking major structural changes.
Building a deck, for instance, requires knowledge of structural design, proper anchoring to the house, and adherence to local building codes. Materials for a 12×16 foot deck can cost anywhere from $1,500 to $5,000 or more, depending on the lumber choice (e.g., pressure-treated pine vs. Composite decking). This project demands precision in cutting, framing, and fastening.
Finishing a basement involves framing walls, running electrical and plumbing, insulating, and drywalling. This can add significant living space and value to a home. However, it’s crucial to understand local building codes for egress windows, ventilation, and electrical requirements. The cost can vary wildly, but a DIY basement finishing project might save tens of thousands compared to hiring professionals.
Common Pitfalls: Mistakes to Sidestep in DIY Home Improvement
Even experienced DIYers can fall into common traps. One of the most frequent mistakes is underestimating the time a project will take. This often leads to rushed work, increased stress, and subpar results. Always add a buffer of 20-30% to your estimated timeline.
Another critical error is not preparing the work area adequately. This can involve failing to protect furniture and floors, not clearing enough space to work, or not gathering all necessary tools and materials beforehand. A disorganized workspace leads to inefficiency and potential damage to your home. For example, a painter who doesn’t properly tape off trim or cover floors risks hours of cleanup and potential damage to finishes.
Cutting corners on quality materials or skipping essential steps (like proper priming before painting or using the correct fasteners for structural elements) is also a recipe for disaster. While it might save money initially, it often leads to premature wear and tear, requiring costly repairs down the line. According to the National Association of Home Builders (NAHB) 2025 homeowner satisfaction report, durability and longevity were key factors cited for successful remodels, emphasizing the importance of quality materials and execution.
Expert Tips for DIY Success
To maximize your chances of success with DIY home improvement, adopt these expert-tested strategies. Firstly, research thoroughly. Watch videos, read guides, and understand each step before you begin. Understanding the ‘why’ behind each action leads to better execution.
Secondly, don’t be afraid to ask for help or consult professionals when needed. If a task feels overwhelming or unsafe, it’s wise to hire a specialist. Many DIYers find success by tackling the bulk of the work themselves and bringing in an electrician or plumber for the critical connections. This hybrid approach can be a smart balance of cost savings and expertise.
Thirdly, learn from your mistakes and celebrate your successes. Each project, regardless of outcome, offers valuable learning opportunities. Documenting your progress, perhaps with photos or notes, can be helpful for future reference. For instance, if you successfully refaced kitchen cabinets, jot down which primer and sealant worked best for your specific wood type, noting the application process.
Frequently Asked Questions
What is the most important step in DIY home improvement?
The most critical step is thorough planning and preparation. This includes assessing your skills, defining the project scope, creating a detailed budget, and gathering the necessary tools and materials before you begin any physical work.
What DIY projects add the most value to a home?
Projects that offer a strong return on investment often include kitchen and bathroom updates, improving curb appeal with landscaping or a new front door, and finishing basements or attics to add usable living space.
How can I save money on DIY home improvement projects?
Save money by buying materials during sales, repurposing existing items, choosing simpler finishes, borrowing or renting specialized tools, and accurately estimating material needs to avoid over-purchasing.
What are common safety risks in DIY home improvement?
Common risks include electrical shock, cuts and abrasions from tools, falls from ladders, respiratory issues from dust or fumes, and injuries from heavy lifting or improper tool operation.
How do I know if a DIY project is too advanced for me?
If a project requires specialized licenses, involves significant structural changes, or presents complex electrical or plumbing challenges you don’t understand, it’s likely too advanced. Trust your gut feeling about your capabilities.
When should I hire a professional for a DIY project?
Hire a professional when a task is beyond your skill level, requires specific certifications or permits, involves critical structural or safety systems (like main electrical or plumbing lines), or when you simply lack the time or desire to complete it safely and effectively.
Your DIY Home Improvement Journey Starts Now
Mastering how to DIY home improvement is a rewarding journey that empowers you to enhance your living space, save money, and build valuable skills. By approaching each project with careful planning, a realistic budget, and a commitment to safety, you can achieve impressive results. Start small, learn as you go, and soon you’ll be tackling more ambitious upgrades with confidence.
Last reviewed: May 2026. Information current as of publication; pricing and product details may change.
Editorial Note: This article was researched and written by the Day Spring Management editorial team. We fact-check our content and update it regularly. For questions or corrections, contact us. For readers asking “How to diy home improvement”, the answer comes down to the specific factors covered above.
Related read: Sewer Inspection in 2026: Your Complete Guide.
Related read: Fix a Well Pump: Your 2026 Guide to Common Issues & Solutions.